推荐下载:PS CC 2018精简版|PhotoShop CC 2018 19.1精简版(64位)
教你导入ps预设图文教程:
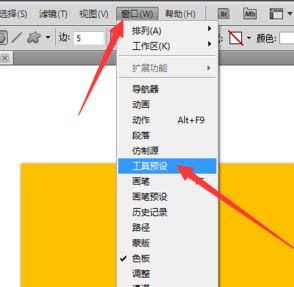
1、点击窗口,在下拉菜单中点击工具预设,如图所示:
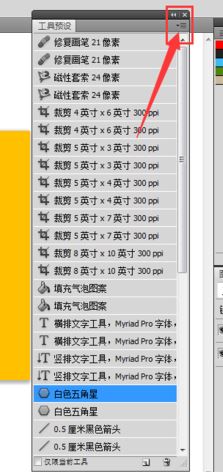
2.、此时我们打开了工具预设面板,接着点击右上角小菜单,如图:
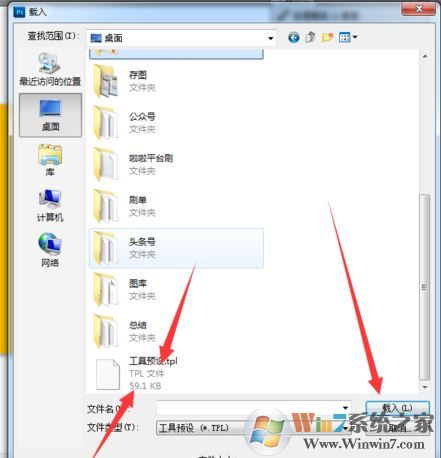
3、在弹出的载入界面指定到预设文件所在位置,双击工具预设,载入即可!
4、工具预设载入了,看工具栏和工具预设是对应的,你选择裁剪类的,就是裁剪工具,一些参数已经设置了可以直接使用!
以上便是winwin7给大家分享介绍的教你导入ps预设图文教程,有需要的用户快去试试吧~
相关文章:
ps怎么导入图片?教你ps导入图片图文教程
Photoshop横排文字蒙版工具怎么用?ps横排文字蒙版工具用法